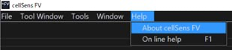
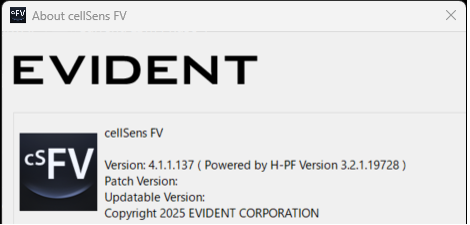
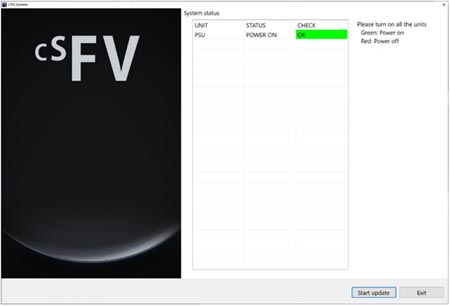
Fluoview Firmware Update for cellSens FV Version 4.1.1 | Fluoview Firmware Update for cellSens FV Version 4.1.1This software is the firmware update for the fluoview™ FV5000, FV5000MPE, FV4000 or FV4000MPE laser scanning microscope with cellSens™ FV imaging software version 4.1.1. When using this software, cellSens FV version 4.1.1 must be installed in the control PC of the FV5000, FV5000MPE, FV4000 or FV4000MPE system beforehand. To confirm the version of cellSens FV software, follow these steps: 1) Launch the cellSens FV software. 2) Select “About cellSens FV” from the Help menu. 3) Confirm your version in the “About cellSens FV” window. Please confirm that the current version is version 4.1.1.137. If the version is different than this, this firmware update is not applicable. Installation1) Turn on the power of the control PC for the Fluoview system, and FV40-PSU. 2) Close all software applications. 3) Save the downloaded file in the appropriate location (desktop, etc.) on the PC. 4)Decompress the downloaded file. 5)Execute the updater (exe file) in the decompressed file folder with the administrator privilege. 6)The LSM Updater window appears.
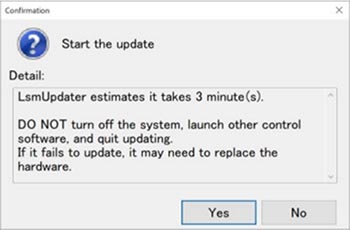
7) Click the Start update button.
8) After updating, the following dialog box will display. Click the OK button.
9) The following dialog box will display. Finish the updater by following the message and turning off the power of all systems and the control PC. Then, turn on the power again.
Note: the firmware cannot be correctly updated by restarting the OS. You need to completely turn off the power of the control PC. 10) The updater starts automatically.
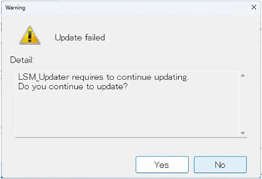
* If the message “Update failed” appears, click “Yes” button. Then, the updater will start and repeat steps 6 to 10 again.
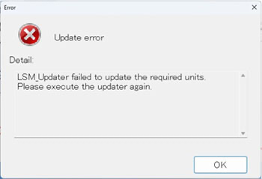
* If the message “Update error” appears, click the OK button. Then, repeat steps 5 to 10 again.
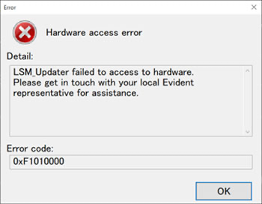
* If the message “Hardware access error” appears, turn off the power of all systems, then turn on only the PC. Next, restart only the OS. After that, turn on the power of the FV40-PSU and wait for the hardware initialization to complete. Then, repeat steps 5 to 10 again.
|
|


Sorry, this page is not
available in your country.